After Ubiquiti’s recent security faux pas, I started to question the best way to access my Unifi Protect cameras. By default, the Unifi Protect uses your Ubiquti account to log in, and disabling remote access breaks this. This can be bypassed with a little work, and if you’re using OPNSense, it’s pretty easy.
Motivation
I won’t comment on the recent security issues Ubiquiti had with their Unifi services, which includes the protect line of gear. It was enough to scare me into locking remote access to my devices more, but also exposed some quirks about the Unifi Protect App.
The Unifi network app has a few ways to find a controller. It can use multicast
to see if one is in the same L2 network as you (it’s on your LAN and replies
directly); it can use a cloud integration to associate a controller with your
account and facilitate access; or it can use a special unifi DNS record to
find a controller places elsewhere.
For the Unifi Protect app, it just has the options to use a cloud based account (the default), or add a local controller via L2 discovery. If your network is like mine and your cameras and NVR are isolated, that translates into relying on the cloud service to find your NVR, even when sitting in your house.
This puts a great deal of reliance on the cloud service, and honestly is just plain silly. This also, crucially, prevents me from disabling remote access. Since we rely on the cloud to connect, disabling the cloud disables our mobile apps.
A number of people have complained vocally to Ubiquiti to allow L3 discovery, but since we’re just looking at multicast traffic, it’s easy to proxy across a network using a service such as UDP Broadcast Proxy.
The Setup
In my case, I run an OPNSense router and UDP Broadcast Proxy is available as a plugin. We’ll make use of that to forward the multicast traffic from my mobile app to the network with my NVR to allow the mobile app to use local discovery. With this, we can then disable cloud access and block my NVR network.
The biggest gotcha I know about here is the fact that push notifications will no longer work. I don’t use them, so it’s not an issue for me.
In general, the traffic will work like this:
- The mobile app sends a multicast discovery packet.
- The packet will reach the UDP Broadcast Proxy service on our router.
- That service will forward the packet to the network with our NVR.
- The NVR will reply, and things will start talking using TCP.
NVR Setup (Optional)
You’ll want to add a new admin with local access. Navigate to your NVR or Cloudkey and go to the Admin section. Add a new admin, selecting local access in the screen and setting the password. If you’ve already disabled remote access, it’ll default to a local access account.
If you want, you can also continue to use your normal SSO account. Keep in mind that authentication needs to leave your network, so you’re still vulnerable to outages if you opt for this.
Everything else in the Cloudkey or NVR can remain the same.
OPNSense Setup
First, install the UDP Broadcast Relay plugin. Navigate to System > Firmware > Plugins in your OPNSense router and search for the plugin. The plugin is in the main repos, so there shouldn’t be anything extra needed other than just pressing install.
Next, navigate to Services > UDP Broadcast Relay and click the plus to add a new Instance. Configure it with these settings:
- Relay Port: 10001
- Relay Interfaces: Pick your LAN and Camera networks, or any other networks that should have NVR access
- Broadcast Address: 233.89.188.1 (This the multicast address used by the Unifi Discovery protocol)
- Source Address: Blank
- Instance ID: Any number, probably 1 if this is your first instance.
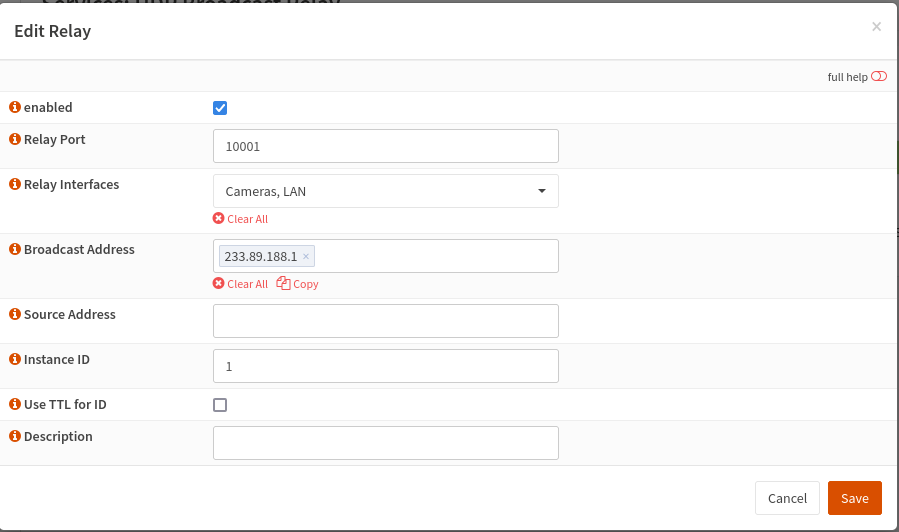
Click Save, and you should have one green-highlighted row.
Next, we need to setup some firewall rules probably. This depends on the level of isolation, and the specifics of your network, but in my case these networks are not generally allowed to talk back and forth so both are required.
First, we need a rule to allow the multicast traffic in. Add a rule for your LAN network (or any network that you added in the step above). The defaults are fine, but set these values:
- Action: Pass
- Protocol: UDP
- Destination: Single host or Network / 255.255.255.255/32
- Destination Port: 10001
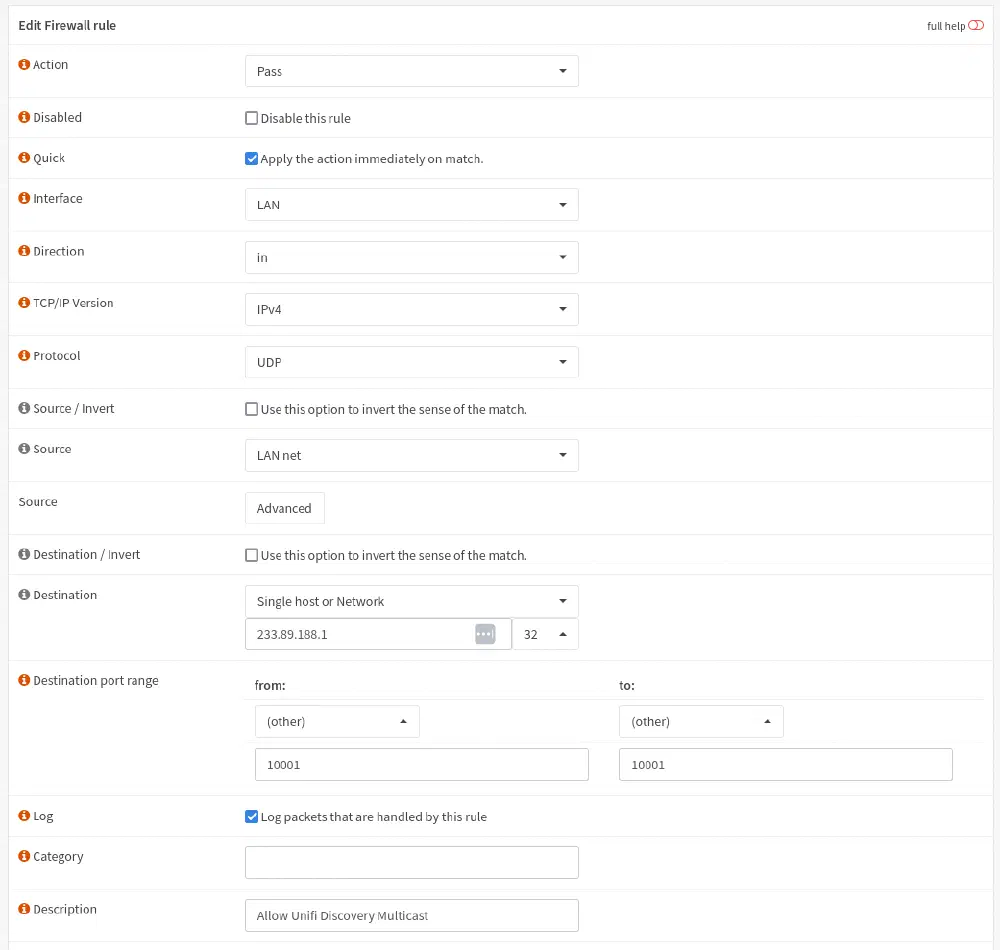
Note: This IP changed since the original post. I noticed that either by my omission or by a change in the Unifi Protect app, it now sends normal broadcast data rather than multicast. The above step has been updated
And to allow the return packets, we need an out rule also set up on the LAN network. In my case, I use Out rules for network isolation. You may need to adjust this depending on how you’ve set up your isolation.
- Action: Pass
- Direction: Out
- Protocol: UDP
- Source: Cloudkey or NVR IP
- Source Port Range (under Advanced): 10001
- Destination: Any
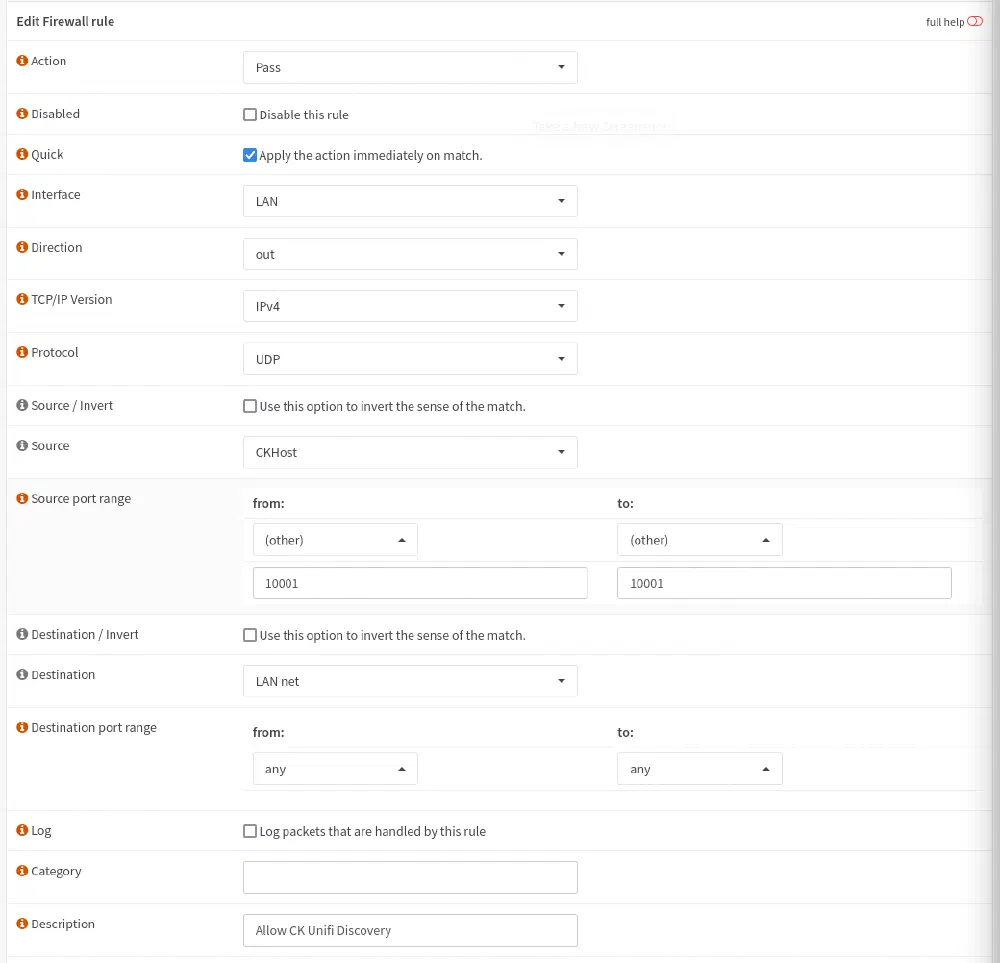
The first rule allows step 2 of our handshake to take place, the second rule lets step 4 take place. These rules are also just for the discovery, the normal traffic is TCP.
App Setup
You’ll need to log out of the Protect app to get to the default screen. When on the screen to login, select “Find local consoles.” After a moment, you should see your console and can sign in using the account you created earlier. You can use your ui.com account as well if you prefer, but authentication would still need to reach out and may go offline.
Closing Thoughts
It’d be nice if we could just make use of L3 discovery, but alas here we are. In all, it’s not too horrible to get up and running and should let us lock down cameras even tighter to prevent future security issues from affecting us.